earlymb Posted June 16, 2020 Share #76 Posted June 16, 2020 It looks absolutely spot-on! Link to comment Share on other sites More sharing options...
Old Marine Posted June 18, 2020 Share #77 Posted June 18, 2020 That's looking real good Manny! You did a fantastic job with the building. Link to comment Share on other sites More sharing options...
mikie Posted June 18, 2020 Share #78 Posted June 18, 2020 On 6/14/2020 at 9:20 PM, ArtyScout said: Well I got the cottage built and weathered. I really didn't want the cottage looking like the box art, but it did, except for the door and window trim. Believe me the house will have a different color scheme. I also was able to put a sewer drain in the base. Next is the ground foliage, tree, iron fence and then onto the big house. Enjoy the pics. Semper Fi. Manny That is just wonderful! Link to comment Share on other sites More sharing options...
ArtyScout Posted June 19, 2020 Author Share #79 Posted June 19, 2020 Thanks for the comments fellas. Now I did the tree and grass area. Not my best tree, but it works. As for the groundwork I'm letting it dry and if I have to I'll add some static grass. But I'm happy with it and the iron fence. I really did not want a wooden fence here. Now for the big house. Enjoy the pics. Semper Fi. Manny Link to comment Share on other sites More sharing options...
Proud Kraut Posted June 19, 2020 Share #80 Posted June 19, 2020 Awesome, grass and tree are looking uber-realistic. Did you make this tree yourself??? How??? Link to comment Share on other sites More sharing options...
ArtyScout Posted June 22, 2020 Author Share #81 Posted June 22, 2020 Thanks Lars. FYI, I did NOT make the tree myself although I know how to. I was fortunate enough to have one in my parts box and I put it to use. I did have to paint and weather it to make it look like a real tree and I intend to even tone the trunk colors down a little more when I start putting this diorama together. I began on the big house and I'm also adding a street lamp and road sign. Semper Fi. Manny Link to comment Share on other sites More sharing options...
Old Marine Posted June 24, 2020 Share #82 Posted June 24, 2020 Looks good to me. You are making good progress. Link to comment Share on other sites More sharing options...
ArtyScout Posted June 28, 2020 Author Share #83 Posted June 28, 2020 Thanks Dennis. This has been a long and stressful week for me so I haven't done much work, except for today. I'm only posting the lamp post but believe me, today I did some work on the big house and the route sign. So next post they'll be some more pics. BTW the lamp post has not been glued there permanently yet. Although that's where its going to wind up. LOL Semper Fi. Manny Link to comment Share on other sites More sharing options...
Proud Kraut Posted June 28, 2020 Share #84 Posted June 28, 2020 Hope you have the chance to calm down my friend. At least you added a very nice detail to your base. Well, if I do look at it again...I´m thinking of a dog.... Link to comment Share on other sites More sharing options...
ArtyScout Posted July 10, 2020 Author Share #85 Posted July 10, 2020 Hahahaha, thanks Lars, I seem to have a dog in my parts box or in a figures box somewhere. Lets see how I feel about a dog. I did get this one sign post done. I haven't done much work, although I'm looking forward to finishing up the big house and putting it all together.I do need to repair my spray booth, so I can get back to the fun. Now the "Dunkirk" and km decals are great but I thought Tamiya messed up. But I'm not going to go crazy about it. But if this is northern France and I'm heading towards Dunkirk, the decal should have been written as "Dunkerque". but I checked on Google Maps and it seems like both spellings are acceptable. I'll live with it. I'll weather the sign and put it in its place. Semper Fi. Manny Link to comment Share on other sites More sharing options...
ArtyScout Posted July 25, 2020 Author Share #86 Posted July 25, 2020 Hello All; I know I haven't posted anything in awhile. But I was having problems with my spray paint booth. Well I have the house painted. Now to put it together and weather it, put it on the diorama along with the rest of the other parts and I hope to be done with that soon. Semper Fi. Manny Link to comment Share on other sites More sharing options...
Proud Kraut Posted July 25, 2020 Share #87 Posted July 25, 2020 Looks good, can' t wait to see how you do the weathering. Link to comment Share on other sites More sharing options...
ArtyScout Posted July 28, 2020 Author Share #88 Posted July 28, 2020 Well its finally done. The roof on the big house gave me some fits but its done. I was thinking about putting some grass along the building edge, but I'm still mulling it. I'll probably put some more pics up later since I only took the pics from two angles. All comments and critiques are greatly appreciated. I think my next project will take me into the post-Korea Cold War M41 Walker Bulldog. Semper Fi Manny Link to comment Share on other sites More sharing options...
ArtyScout Posted July 28, 2020 Author Share #89 Posted July 28, 2020 One more! Link to comment Share on other sites More sharing options...
Proud Kraut Posted July 28, 2020 Share #90 Posted July 28, 2020 Excellent dio Manny! You did a superb job on the houses and the small garden, they are a perfect background for the advancing vehicles. According to the "Race" title a very dynamic and realistic street scene. That´s how a perfect dio should look like. WELL DONE! Link to comment Share on other sites More sharing options...
earlymb Posted July 28, 2020 Share #91 Posted July 28, 2020 I agree, amazing result! Link to comment Share on other sites More sharing options...
mikie Posted July 30, 2020 Share #92 Posted July 30, 2020 Beautiful job. Link to comment Share on other sites More sharing options...
Proud Kraut Posted July 30, 2020 Share #93 Posted July 30, 2020 This is our first pinned topic in the WMF modeling section. It´s a perfect tutorial how to build an excellent dio step by step. Thanks Manny! Link to comment Share on other sites More sharing options...
ArtyScout Posted July 31, 2020 Author Share #94 Posted July 31, 2020 Well thank you all for your comments and thank you Lars for pinning this post as a tutorial. I'm honored and touched. Semper Fi. Manny Link to comment Share on other sites More sharing options...
Old Marine Posted August 1, 2020 Share #95 Posted August 1, 2020 Well Done Manny. That's really great work. Link to comment Share on other sites More sharing options...
ArtyScout Posted August 3, 2020 Author Share #96 Posted August 3, 2020 Thank you Dennis & Mikie for your comments. I was debating about putting up some more pics. Semper Fi. Manny Link to comment Share on other sites More sharing options...
ArtyScout Posted August 15, 2020 Author Share #97 Posted August 15, 2020 Hey All, I noticed that ALL my pics were frontal view, so I'm adding some rear view pictures. Semper Fi. Manny Link to comment Share on other sites More sharing options...
Proud Kraut Posted August 15, 2020 Share #98 Posted August 15, 2020 Great addition to the topic, thanks for the new pics! Link to comment Share on other sites More sharing options...
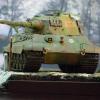
Connor1941 Posted October 12, 2022 Share #99 Posted October 12, 2022 On 4/4/2020 at 2:55 PM, ArtyScout said: I've started my next diorama. It's titled "The Race to the Channel". It depicts the Rommel's 7th Pz. Division under as it races toward Dunkirk in 1940. The first part I've made is the BMW motorcycle. I still have to add the MG-34 machine gun and the soldiers and also to add some weathering. As always all comments and critiques are welcome. Semper Fi. Manny Awesome! Link to comment Share on other sites More sharing options...

Recommended Posts
Create an account or sign in to comment
You need to be a member in order to leave a comment
Create an account
Sign up for a new account in our community. It's easy!
Register a new accountSign in
Already have an account? Sign in here.
Sign In Now