Proud Kraut Posted August 9, 2021 Share #26 Posted August 9, 2021 Wow, I´m impressed by the detail of this Pak. Know what you are talking about concerning the microscopically small parts but the result is awesome. Compared with the 40 years old Tamiya or Italeri Pak 40 your´s is a class of it´s own. Love the one piece muzzle brake and the metal barrel and shields. Did you have to bend them or did they came ready for assemble? Link to comment Share on other sites More sharing options...
Old Marine Posted August 9, 2021 Share #27 Posted August 9, 2021 That’s some fine meticulous work Manny. I agree with Lars the detail on the PAK. It’s a lot of work but the payoff is worth your effort. Your tanks came out great too. Both are very fine pieces. Its good to be able to eyeball some nice work. Link to comment Share on other sites More sharing options...
ArtyScout Posted August 10, 2021 Author Share #28 Posted August 10, 2021 Hey Lars, Dennis; thanks for the comments. I appreciate your input. Lars I hate to disappoint you but the muzzle brake was two halves that I had to glue onto the aluminum barrel. I did my best with the shields with the bolts and I was lucky that the shields were already bent into their shapes. I'll post more pics as I go along. Semper Fi. Manny Link to comment Share on other sites More sharing options...
ArtyScout Posted August 17, 2021 Author Share #29 Posted August 17, 2021 Well I'm going to post some WIP pics and then the finished Pak 40. It's a nice clean build and I will definitely give it the weathering its due. I have pics on the lower carriage, the base coat painting and then the finished gun with some camouflage. Like I had previously posted; this kit has a lot of unnecessary parts to put together but it goes together well. I will honestly say that I'm disappointed with the shield bolts. As always all comments and critiques are greatly appreciated. Link to comment Share on other sites More sharing options...
ArtyScout Posted August 17, 2021 Author Share #30 Posted August 17, 2021 Here are the WIP base paint pics. Also the tires are actual rubber tires with the Continental logo on the sidewall. Link to comment Share on other sites More sharing options...
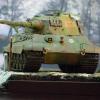
ArtyScout Posted August 17, 2021 Author Share #31 Posted August 17, 2021 And here are the finished WIP photos. Like I said I still have to give it some weathering. Semper Fi. Manny Link to comment Share on other sites More sharing options...
RRA227 Posted August 17, 2021 Share #32 Posted August 17, 2021 Looks great. Rich A. in Pa. Link to comment Share on other sites More sharing options...
Proud Kraut Posted August 17, 2021 Share #33 Posted August 17, 2021 Manny, I think it was worth the effort. Great looking Pak. Looking forward to see it weathered and together with the other tanks. Awesome work so far. Link to comment Share on other sites More sharing options...
mikie Posted August 18, 2021 Share #34 Posted August 18, 2021 Simply awesome, Manny. Mikie Link to comment Share on other sites More sharing options...
ArtyScout Posted September 3, 2021 Author Share #35 Posted September 3, 2021 Hey everyone; I know its been awhile since I posted some WIP photos. So here are the first six figures for this diorama. I still have three more figures to do. Here are four Wehrmacht soldiers from Dragon and two tank commanders from Tamiya; although the Pz III commander's head is from Alpine. I'll build the three remaining figures then its off to priming and painting. Semper Fi. Manny Link to comment Share on other sites More sharing options...
Proud Kraut Posted September 3, 2021 Share #36 Posted September 3, 2021 So much work to do in the house and the garden over here and so little time for modeling these days... Manny, good to see that your project makes great progress. Thanks for sharing the WIP pic! Looking forward to see all 9 figures built and painted. Lars Link to comment Share on other sites More sharing options...
RRA227 Posted September 4, 2021 Share #37 Posted September 4, 2021 Looks nice. Rich A. in Pa. Link to comment Share on other sites More sharing options...
ArtyScout Posted September 7, 2021 Author Share #38 Posted September 7, 2021 The Pak 40 crew. These are resin figures from Warriors. Everyone has been primed and puttied where needed, now its off to painting. Wish me luck. Semper Fi. Manny Link to comment Share on other sites More sharing options...
Proud Kraut Posted September 7, 2021 Share #39 Posted September 7, 2021 Wow, these are some very detailed figures. I´m curious which camo pattern their uniforms will receive. Great job so far! Link to comment Share on other sites More sharing options...
Old Marine Posted September 7, 2021 Share #40 Posted September 7, 2021 As Lars has said, those are some great looking figures. Unsolicited advice, paint in thin coats and let the colors build up. Those are fine looking figures. l moved so all my stuff is packed in boxes in a big pile in the back room. Hopefully I’ll get back to painting and building soon. keep posting the photos, seeing the models and figures you guys produce keep me going with this move. Link to comment Share on other sites More sharing options...
RRA227 Posted September 7, 2021 Share #41 Posted September 7, 2021 Nice figures. Rich A. in Pa. Link to comment Share on other sites More sharing options...
ArtyScout Posted September 9, 2021 Author Share #42 Posted September 9, 2021 Hey all; thanks for the comments. Dennis I will be taking your advice and Lars I was thinking about doing the splinter camo, but that could be tedious with 1/35 scale although I've seen "how to instructional" videos. But they really don't look all that good. Now with larger scale figures I would definitely attempt it. So I'll just do a nice KISS (Keep It Simple Son) camouflage. I've done the faces; the Warriors figures came out nice, the Dragon faces somehow all look alike LOL, and the Tamiya TC looks OK too. I have to tweak the Alpine head (headphones). Semper Fi. Manny Link to comment Share on other sites More sharing options...
ArtyScout Posted September 22, 2021 Author Share #43 Posted September 22, 2021 Hello all. Unfortunately I'm in the middle of a big garage & basement cleanup, so I haven't been able to do more work than I wanted but I've been able to get some things done. I did some of the figures with the splinter camo. I used a 20/0 Liner brush but the lines still came out thick but acceptable for a 1/35 figure. The pea dot camo always comes out better for me. BTW the last figure has one more set of dots to be applied. As always all comments and critiques are greatly appreciated. Semper Fi. Manny Link to comment Share on other sites More sharing options...
Proud Kraut Posted September 22, 2021 Share #44 Posted September 22, 2021 Awesome work on the camo uniforms, very realistic. I tried to paint the splinter camo smocks as well some years ago. Your´s look much more realistic. Well done, Manny. Lars Link to comment Share on other sites More sharing options...
Old Marine Posted September 22, 2021 Share #45 Posted September 22, 2021 Great work on the camo! You did a fantastic job, nice crisp colors. Well done. Link to comment Share on other sites More sharing options...
RRA227 Posted September 23, 2021 Share #46 Posted September 23, 2021 Looks great. Rich A. in Pa. Link to comment Share on other sites More sharing options...
ArtyScout Posted October 1, 2021 Author Share #47 Posted October 1, 2021 Hello All; Well the weather seems to be getting a little cooler now that October is upon us. Well I finished the first 7 figures. They still need their weathering and dirtying up since they look too clean but that will come after I finish painting the Pz. II & III commanders. The 4 figures are from Dragon and I felt like the helmets were a little big although they came with that kit. The camo helmet I got from my parts box. Now we start putting it all together. Oh BTW there is a bombed out building that will have to go together and painted too. But that's another chapter. Enjoy the pics and as always ALL comments and critiques are greatly appreciated. Semper Fi. Manny Link to comment Share on other sites More sharing options...
Proud Kraut Posted October 1, 2021 Share #48 Posted October 1, 2021 The splinter and the dot camo uniforms came out excellent, I like them really much. On the first pic of your last post the coats look rather grey than field grey on my PC. I assume it´s because of the flashlight, right? Link to comment Share on other sites More sharing options...
ArtyScout Posted October 1, 2021 Author Share #49 Posted October 1, 2021 4 hours ago, Proud Kraut said: The splinter and the dot camo uniforms came out excellent, I like them really much. On the first pic of your last post the coats look rather grey than field grey on my PC. I assume it´s because of the flashlight, right? Hey Lars, thanks for the comments. The 'great coats' are painted in German Grey instead of Field Grey. I went along with the kit (Dragon) colors. You would think I would know better by now. But I have noticed that the M40 Greatcoat has a more grey tone than the field grey greenish-grey tone. So its not your PC. Semper Fi. Manny Link to comment Share on other sites More sharing options...
ArtyScout Posted October 13, 2021 Author Share #50 Posted October 13, 2021 Hello All; I finally finished all the figures. If any tweaking is to be done I'll do it later as I go along. I did the weathering on the leather gear and dry brushed the smocks to downplay the camo patterns. Now its off to do the base and ruins. Hope everyone is well. As always all comments and critiques are greatly appreciated. Semper Fi. Manny Link to comment Share on other sites More sharing options...

Recommended Posts
Create an account or sign in to comment
You need to be a member in order to leave a comment
Create an account
Sign up for a new account in our community. It's easy!
Register a new accountSign in
Already have an account? Sign in here.
Sign In Now